
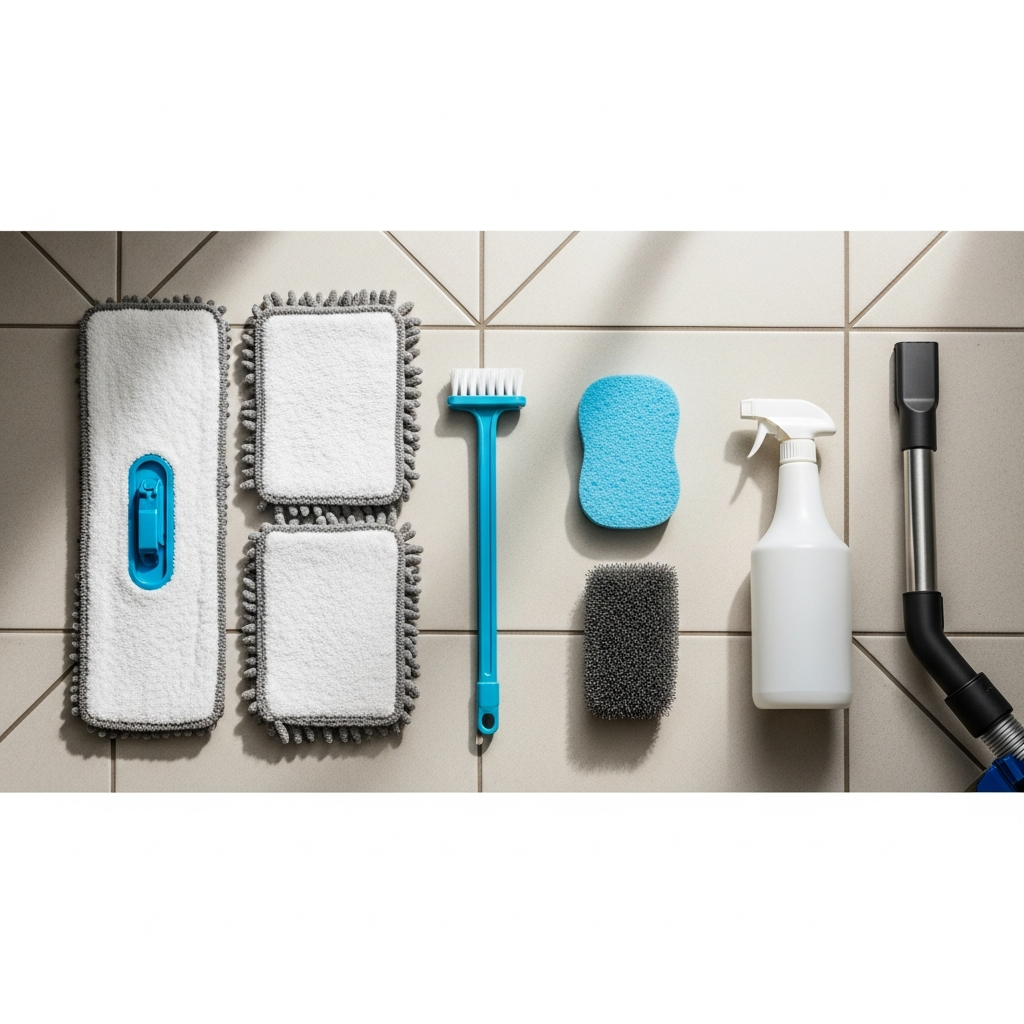
The Essential Tile and Grout Cleaning Equipment for Elizabeth, NJ Homes
From kitchens in Elmora to bathrooms near North Elizabeth and basements across Union County, tile remains one of the hardest-working surfaces in local homes. Yet it takes the right equipment to keep tiles bright and grout lines crisp through winter slush, summer humidity, and year-round activity. This guide covers the tools and gear—manual and powered—that deliver reliable, professional-grade results without overcomplicating your routine. If you ever prefer an expert touch for big resets or delicate surfaces, proven local tile and grout cleaning is always an option to safeguard your finish and save time.
Before you buy or borrow gear, identify your tile type (ceramic, porcelain, or natural stone) and grout (sanded, unsanded, or epoxy). Matching equipment to materials protects finishes and prevents premature wear.
Manual Tools Every Home Needs
Microfiber mop system: A high-quality, flat microfiber mop with replaceable pads is the backbone of routine care. Microfiber lifts fine soil that traditional mops smear, reducing residue and haze. Keep separate pads for cleaning solution and rinse water, and launder pads without fabric softener.
Grout brushes: Choose a narrow, stiff nylon brush for sanded grout and a medium bristle for delicate or aging joints. The slim profile targets lines without abrading tile edges. Store brushes in a caddy so they are always within reach for quick touch-ups.
Detail brushes: A small, soft-bristle brush tackles corners, shower niches, and around fixtures. It is gentle enough for caulk lines while still effective on soap film.
Scrub pads: White or beige non-scratch pads handle tile faces without scuffing glazes. Use them with a neutral cleaner for weekly refreshes or to remove light films near cooktops.
Microfiber towels: Essential for buff-drying after rinsing. They remove remaining moisture that can leave spots in Elizabeth’s humid months and help achieve a streak-free sheen.
Powered Tools for Deeper Cleaning
Handheld oscillating scrubbers: Compact and versatile, these tools deliver consistent micro-oscillation that lifts soil without gouging. Fit them with soft pads for tile faces and a narrow brush for grout lines. They are perfect for showers and small bathrooms.
Orbital floor machines: For larger rooms, an orbital machine paired with soft pads ensures even agitation. It helps remove stubborn films that mopping leaves behind and shortens deep-clean time across open layouts.
Wet/dry vacuum: Not a scrubber, but indispensable. Extraction pulls dirty solution from grout pores and speeds drying—crucial in basements or during humid summers. A squeegee attachment helps collect slurry before vacuuming.
Steam tools (with caution): On sealed ceramic and porcelain, light-duty steam can loosen grime in crevices. Keep the nozzle moving and avoid prolonged exposure on grout or any natural stone. Always test in a hidden area first.
Cleaning Solutions and How to Use Them
Neutral cleaner: Your daily driver for ceramic and porcelain, safe on most sealed grout. It removes routine soil without residue. Dilute precisely and rinse as needed.
Alkaline degreaser: Reserve for kitchen trouble zones where oils accumulate. Apply to small areas, allow dwell time, and agitate gently. Rinse thoroughly to avoid films.
Stone-safe cleaner: For marble, travertine, and slate, a pH-balanced formula protects surfaces from etching. Pair with soft pads and light pressure.
Oxygenated cleaner: Useful for brightening light grout and tackling organic stains. Mix fresh, apply to pre-wetted lines, allow dwell, and rinse thoroughly to prevent re-crystallization.
Penetrating sealer: After deep cleaning and complete drying, apply a penetrating sealer to grout to slow stains and make maintenance easier. Wipe excess from tile faces immediately.
Configuring a Home Cleaning Kit
Build a kit tailored to your home’s mix of rooms. For a typical Elizabeth kitchen and two bathrooms, stock a flat microfiber mop with multiple pads, a narrow grout brush, a handheld oscillating scrubber, a neutral cleaner, a gentle descaler for ceramic and porcelain showers, a wet/dry vacuum, microfiber towels, and a penetrating sealer. Add knee pads and non-slip shoes to reduce fatigue and improve safety.
Label spray bottles clearly and keep Safety Data Sheets handy. Store chemicals in a cool, dry place away from children and pets.
Step-by-Step: Using Your Equipment Like a Pro
Prep the area by clearing rugs and small furniture. Vacuum or dust-mop thoroughly to remove grit. Mix your chosen cleaner exactly as directed—stronger solutions increase residue rather than effectiveness. Apply cleaner to a small section and allow dwell time. Agitate with your scrub pad or machine using slow, overlapping passes. Target grout lines with a narrow brush.
Rinse with clean water and extract the slurry with your wet/dry vacuum. Buff dry with microfiber to prevent spotting. Move methodically across the room. When finished, allow full drying before sealing grout, and follow sealer cure times before heavy use.
Special Tips for Elizabeth’s Climate
Winter deicers and sand can scratch tile and discolor grout; use mats at every entrance and vacuum more frequently during storm cycles. In summer, crank up fans or run a dehumidifier during and after cleaning to speed drying and prevent musty odors. Older homes with uneven floors benefit from softer pads and lighter pressure to avoid edge wear on tile.
Basements are prone to efflorescence—a white, powdery deposit from migrating salts. Dry-brush and vacuum the powder first, then clean lightly and ensure the space dries fully to discourage recurrence.
Maintenance Scheduling and Tool Care
Weekly: Vacuum or sweep and spot-clean spills. Biweekly: Neutral clean high-traffic zones and buff dry. Monthly: Detail grout lines in kitchens and entries with a grout brush. Quarterly: Perform a methodical deep clean with agitation and extraction. Annually: Reseal grout in high-use areas or whenever water stops beading.
Rinse pads and brushes after each session and air-dry. Launder microfiber without fabric softener. Inspect your wet/dry vacuum for clogs and rinse tanks to prevent odors.
When Equipment Cannot Solve the Problem
Persistent grout darkening may be permanent staining or discolored sealer. Etched stone appears dull no matter how much you clean. Crumbling grout or loose tiles point to structural issues, not just soil. In these cases, cleaning equipment can only go so far; consider spot repairs, color sealing, or professional assessment to diagnose and correct the underlying problem.
There is also a learning curve with powered tools. If your first attempts leave haze or inconsistent results, step back to evaluate dilution, dwell time, agitation speed, and extraction quality. For a guaranteed reset and tailored plan, you can bring in mid-project tile and grout cleaning to restore uniform color and sheen.
Frequently Asked Questions
Do I need a powered scrubber, or will manual tools suffice? For small spaces and light soil, manual tools work well. Powered scrubbers shine in larger rooms or when films persist after careful mopping.
Which brush is safest for grout? A narrow nylon grout brush is ideal. Use medium stiffness on delicate or aging grout and stiffer bristles on robust, sanded joints.
Is steam safe on my tile? Light steam can help on sealed ceramic and porcelain, but avoid on natural stone and be careful around unsealed or cracked grout. Always test in a hidden spot.
Why does residue keep returning after I clean? Residue often comes from over-concentrated cleaners or skipping the rinse. Measure dilution precisely, rinse with clean water, extract, and buff dry.
How often should I reseal grout? In high-traffic areas, every 12 to 18 months is typical. Test by placing a few water drops on grout; rapid absorption means it is time to reseal.
Can I scratch tile with the wrong pad? Yes. Avoid aggressive pads and start with the softest option that still cleans effectively. Test in an inconspicuous area first.
What is the best way to speed drying? Use fans, open windows when weather allows, and a wet/dry vacuum to extract solution. In humid months, a dehumidifier helps significantly.
How do I handle efflorescence? Vacuum or brush away the powder dry, then perform a light clean. Address moisture sources and improve ventilation to reduce recurrence.
Make Your Tile Shine Year-Round
The right combination of tools, technique, and timing keeps tile vibrant and grout protected through New Jersey’s changing seasons. Build a thoughtful kit, follow a steady routine, and prioritize extraction and drying for a residue-free finish. When you want a flawless reset—or simply to save a weekend—book professional tile and grout cleaning and enjoy brighter rooms with less effort.