How to Do Tile and Grout Cleaning at Home in Elizabeth, New Jersey
Clean tile and bright grout transform a room—making kitchens look more inviting, entryways feel organized, and bathrooms appear spa-fresh. Yet everyday life in Elizabeth, New Jersey introduces challenges: winter slush and road salt in mudrooms, cooking residues in busy kitchens, and summer humidity that encourages sticky films. With the right plan, you can tackle much of the work yourself and preserve the life of your surfaces between professional visits. This detailed, step-by-step guide shows you how to clean tile and grout safely at home, when to escalate to specialized help, and how to keep results going week after week. For a deeper understanding of professional processes and when to call in reinforcements, explore expert tile and grout cleaning resources to see how method and equipment raise the bar.
What follows is a practical roadmap tailored to Elizabeth’s climate and housing stock—from pre-war bathrooms with small mosaic tiles to newer kitchens with large-format porcelain and narrow grout joints.
Know Your Surface: Tile and Grout Basics
Before you reach for a cleaner, confirm what you are working with:
- Porcelain and ceramic tile: Durable and common in kitchens and baths; generally tolerate neutral or mildly alkaline cleaners.
- Natural stone: Marble, limestone, and travertine are more sensitive; avoid acidic products that can etch or dull the surface.
- Grout types: Sanded grout (wider joints) is common on floors; unsanded grout (narrow joints) appears in walls and finer lines. Epoxy grout resists staining and often needs different care.
If you are unsure, test a small, hidden area before cleaning a large space. When in doubt with natural stone, err on the side of neutral pH products designed for stone.
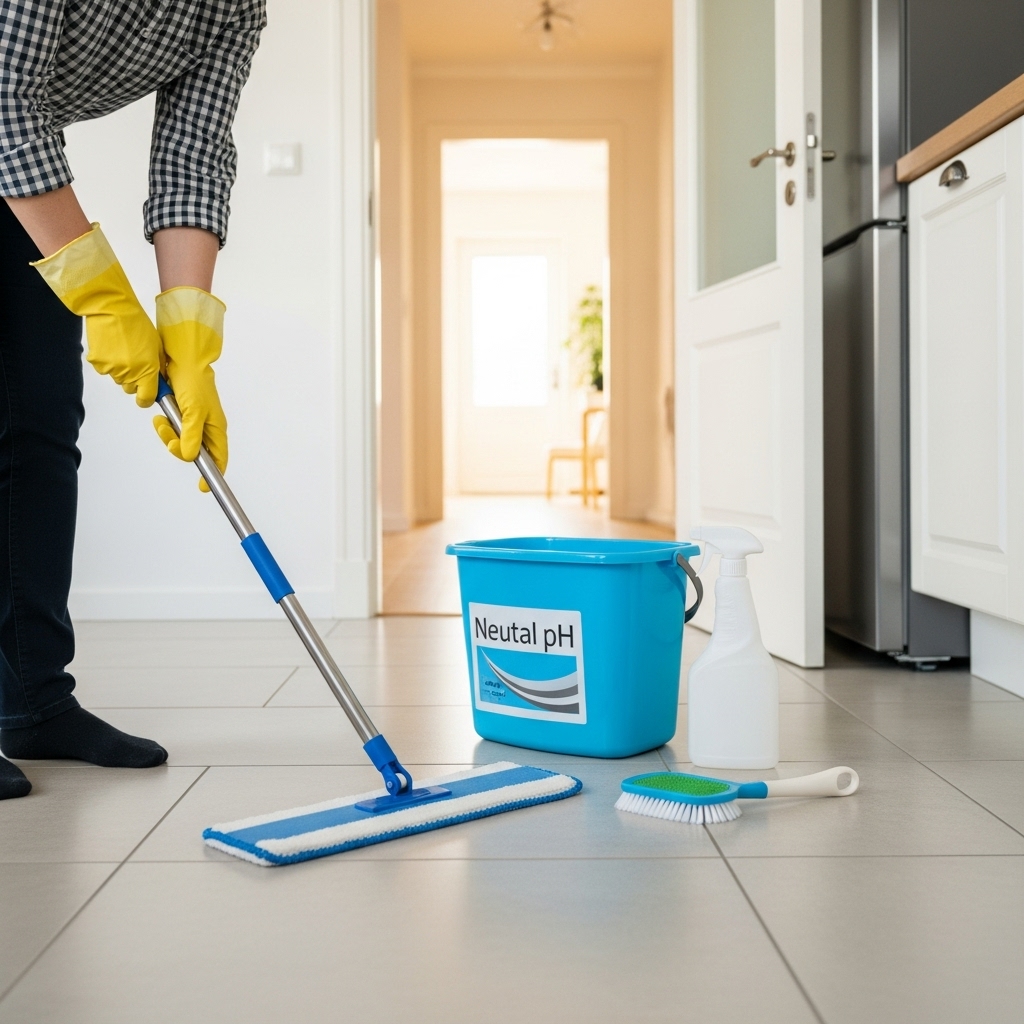
Tools and Products to Gather
Having the right tools at hand makes home cleaning more effective and less frustrating:
- Vacuum with a hard floor setting or soft broom for dry soil removal.
- Bucket and microfiber mop or flat mop.
- Soft to medium nylon brushes: one narrow for grout lines, one larger for tile surfaces.
- Neutral pH floor cleaner appropriate for tile; a stone-safe cleaner if working on natural stone.
- Spray bottle for targeted application.
- Clean towels for drying and detailing.
- Squeegee for shower walls and floors.
- Protective gloves and good ventilation, especially for bathrooms.
Avoid metal brushes or abrasive pads that can scratch tile or fray grout. Skip oil-based soaps that create a residue film.
Step-by-Step: Routine Floor Cleaning
- Dry soil first: Vacuum or sweep thoroughly to remove grit that could scratch tile during wet mopping. Focus on corners, edges, and under appliances.
- Mix a neutral cleaner: Follow the label for dilution; more is not better and can leave a dull residue.
- Pre-spray trouble spots: Lightly mist darker grout lanes or sticky areas and let the solution dwell for a few minutes.
- Agitate: Use a nylon grout brush to scrub lines in traffic zones, then work outward. For textured tile, a larger soft brush helps lift soil.
- Mop in sections: Wring your mop well and work in manageable zones, refreshing the solution as it becomes cloudy.
- Rinse if needed: If a film remains, follow with clean water to remove any residue.
- Dry and inspect: Towel-dry edges and corners to prevent water marks and to see true results.
This routine keeps everyday soil from settling deep in grout and reduces the need for heavy scrubbing later.
Deep Cleaning Grout by Hand
When grout lines stay dark after a standard routine, a more focused approach helps:
- Isolate a test area: Choose a small area in an inconspicuous corner to confirm method and results.
- Use a targeted cleaner: Select a grout-safe, pH-appropriate product. Apply to the lines and allow proper dwell time per label.
- Scrub in short strokes: Work the brush across the joint and along it. Keep pressure even to avoid fraying grout edges.
- Wipe and rinse: Remove suspended soil with a damp towel, then rinse and dry to prevent residues from resettling.
- Evaluate and repeat: If the improvement is significant, proceed across the floor in sections.
Patience matters. Rushing dwell time or skipping rinsing can leave streaks or haze that dull the look of your tile.
Showers and Bathroom Walls
Bathrooms need special care due to soap scum and hard water deposits:
- Ventilate: Use fans or open a window. Warm surfaces clean more easily, so run the shower briefly with hot water to loosen residue before cleaning.
- Apply cleaner: Use a bathroom-safe product designed for soap residue and mineral build-up; test first on natural stone.
- Agitate strategically: Use soft brushes for grout and non-scratch pads for tile.
- Rinse thoroughly: Soap film left behind can cause rapid re-soiling and a slippery feel.
- Squeegee daily: After showers, squeegee walls and floors to minimize spotting and future buildup.
For glass mosaics or decorative accents, treat gently. Avoid aggressive scrubbing that could dislodge tiles or scratch finishes.
Entryways and Mudrooms in Elizabeth’s Winters
Road salt and fine grit are common in colder months. Protect your tile and grout with these habits:
- Mats inside and out: Trap grit before it reaches your floors.
- Daily dry soil removal: Quick vacuum passes in winter preserve grout and reduce scratches.
- Prompt spot cleaning: Wipe up slush and salt quickly to avoid white residue; rinse with clean water afterward.
- Periodic deep cleaning: When you notice gray traffic lanes, scrub those grout channels before the discoloration sets in.
Pairing mats with consistent dry soil removal is your best defense during stormy weeks.
Common Mistakes to Avoid
- Using too much cleaner: Over-concentration leaves film and attracts dirt.
- Skipping rinses: Residue dulls shine and makes floors feel sticky.
- Scrubbing with metal: Scratches tile and damages grout.
- Acids on stone: Vinegar and other acids can etch marble, limestone, and travertine.
- Over-wetting: Flooding floors can drive dirty solution deeper into grout lines.
Following labels, testing small areas, and working methodically will prevent most problems.
When to Call a Professional
DIY methods handle routine build-up, but consider a pro when you see uniform dark grout that does not respond to scrubbing, persistent haze that returns after mopping, or shower staining and mineral scale that outpace your efforts. A professional brings controlled heat, pressure, and extraction that remove embedded soil you cannot reach at home. For a clear picture of what that looks like—and to plan periodic maintenance—review the steps involved in expert tile and grout cleaning so you can decide when to bring in advanced tools.
Creating a Maintenance Schedule That Works
Consistency beats intensity. Here is a practical schedule for busy Elizabeth households:
- Daily: Quick sweep or vacuum in kitchens and entryways; squeegee showers after use.
- Weekly: Damp mop with a neutral cleaner; spot-scrub grout in traffic lanes.
- Monthly: Inspect for dull film, especially near the stove or sink; perform targeted deep cleaning on trouble areas.
- Seasonally: After winter, de-salt entryways; before summer, address sticky films from humidity; in fall, keep up with yardwork dust that travels inside.
- Annually or semi-annually: Consider a professional refresh if discoloration persists or you want to reset worn areas.
Adapting this plan to your household size and routines makes tile care manageable rather than overwhelming.
Safety and Surface Protection
Take simple precautions to protect your health and your finishes:
- Ventilation: Open windows or use exhaust fans during cleaning.
- Gloves: Protect skin from extended contact with cleaners.
- Labeled containers: Never mix products; certain combinations can be hazardous.
- Protect adjacent materials: Mask or towel-protect wood floors, baseboards, and metal fixtures.
- Tread carefully: Allow floors to dry before returning to normal traffic to prevent slips.
These basics keep cleaning safer and more effective.
Frequently Asked Questions
How do I know if my grout needs sealing?
Place a few drops of water on a clean grout joint. If it darkens quickly, it is likely unsealed or the sealer has worn off. Sealing helps resist stains and slows re-soiling.
Can I use steam at home?
Light-duty steam can help on some ceramic or porcelain surfaces, but be cautious around cracked grout, loose tiles, or natural stone. Always test first and keep steam moving to avoid forcing moisture into joints.
Why does my floor feel sticky after mopping?
Over-concentrated cleaners or incomplete rinsing leave residues that attract dirt. Use the right dilution and a clean water rinse if needed.
What is the best mop for tile?
A flat microfiber mop is versatile and effective. It applies solution thinly, lifts fine soil, and leaves fewer streaks than string mops.
How can I brighten stained grout?
Targeted cleaner, proper dwell time, and thorough rinsing often help. For stubborn discoloration, consider color sealing by a professional for a uniform, long-lasting appearance.
Will bleach fix everything?
Bleach can lighten some stains but may weaken grout and is unsafe on many surfaces. Use carefully and sparingly, if at all, and never mix with other products.
How do I handle efflorescence (white powder on grout)?
Efflorescence is mineral migration. Light brushing and a compatible cleaner can help, but persistent cases may require professional assessment to address moisture sources.
Make Your Hard Work Last
With a steady routine, careful product choices, and a focus on dry soil removal, you can keep tile and grout bright despite Elizabeth’s busy seasons. When you want a complete reset—especially for darkened grout or shower build-up—schedule a visit and let specialized tools do the heavy lifting. For long-lasting clarity and a floor that feels freshly renewed, book professional tile and grout cleaning and enjoy the confidence of results that elevate every room in your home.