Homeowners in Elizabeth, New Jersey face a distinctive mix of weather, water hardness, and foot traffic that shapes how tile and grout age. Daily life brings road grit in winter, humid summers that encourage bathroom mildew, and kitchen spills that can seep into porous grout. A clear, repeatable sequence of tile and grout cleaning steps lets you protect finishes, preserve grout color, and cut down the time you spend correcting stubborn issues later. This guide lays out a field-tested approach you can reuse in every room, from a compact condo bathroom to a busy kitchen overlooking Elizabeth River. To set a solid baseline—and to compare your results with industry standards—review methods refined by specialists in tile and grout cleaning so your routine captures what truly makes a difference.
Before you begin, assess your surfaces. Note the tile type (ceramic, porcelain, or natural stone), grout type (sanded, unsanded, or epoxy), and visible problems like discoloration, soap scum, or etching. Confirm that your chosen products are compatible. Cementitious grout reacts poorly to acids, and certain stones need pH-neutral or stone-safe chemistry. A simple compatibility check prevents surface dulling or grout degradation and sets you up for success.
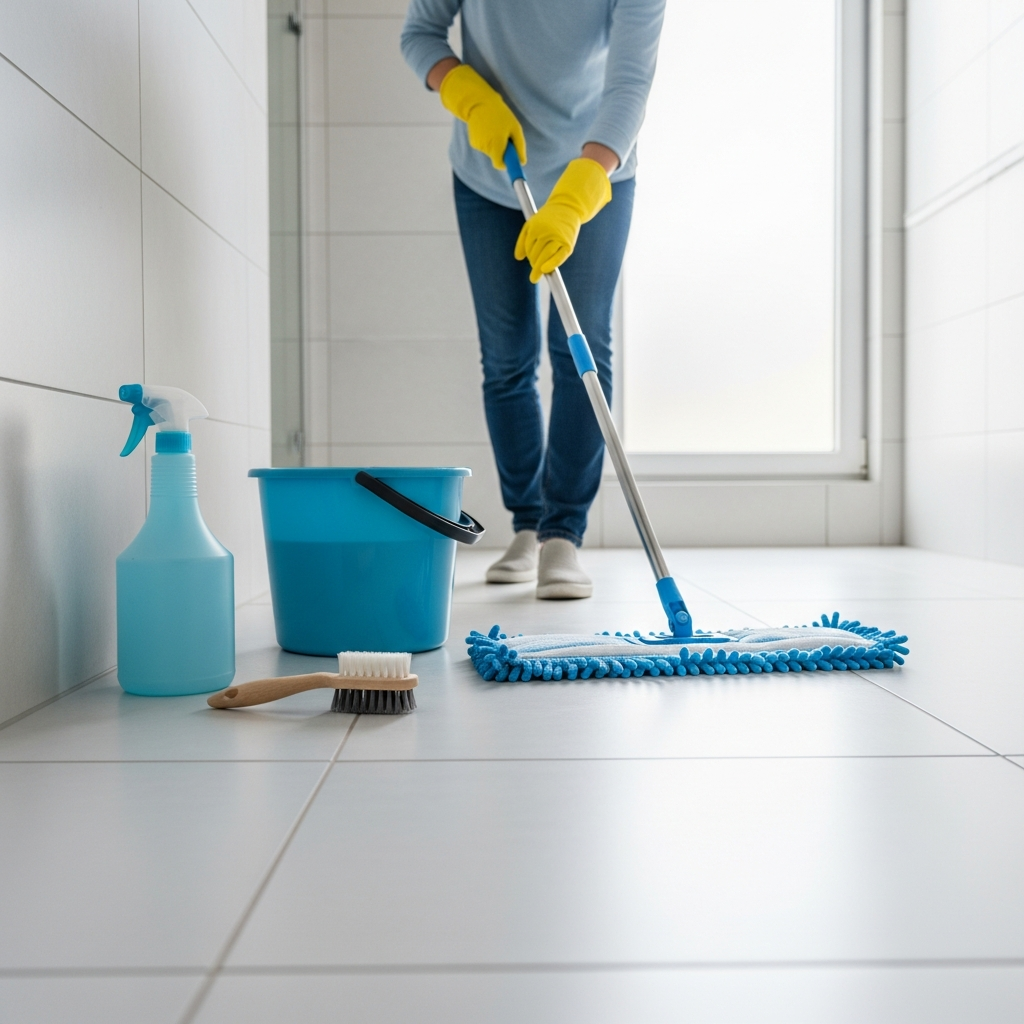
Step 1: Stage the Area and Improve Ventilation
Open windows where practical, start exhaust fans in bathrooms, and clear clutter. Pull lightweight furniture and trash bins away from walls to expose edges and corners. Lay dry towels near entries to keep wet shoes off freshly cleaned areas. Good ventilation speeds drying, discourages mildew, and helps you inspect results without haze caused by lingering humidity, especially during New Jersey’s muggy months.
Staging also means gathering supplies you will actually use: a vacuum with hard-floor settings, a microfiber dust mop, neutral cleaner, a grout-safe cleaning solution, degreaser for kitchens, nylon brushes, microfiber cloths, and two mop buckets labeled “clean” and “recovery.” A spray bottle helps you spot-treat without flooding grout lines.
Step 2: Remove Dry Soil Thoroughly
Dry soil removal is non-negotiable. Vacuum or dust mop first, especially at entryways, around appliances, and under cabinet toekicks. Winter salt and grit can grind into glaze and cause micro-scratches, dulling the surface over time. By capturing debris before wet cleaning, you prevent making a muddy slurry that settles back into grout lines. Take an extra pass where pets eat or where shoes pile up.
Step 3: Pre-Treat Problem Zones
Identify heavy-use lanes, greasy backsplash areas, and shower corners. Apply the appropriate cleaner and allow the recommended dwell time. In kitchens, focus on cooktop perimeters, refrigerator handles, and trash areas. In bathrooms, target soap scum on lower walls and mineral deposits around fixtures. Agitate gently with a nylon brush along grout lines, then pause to let chemistry work. Pre-treating buys you later efficiency because stubborn soils loosen while you address other sections.
Step 4: Clean the Field Tiles
Work in small sections. Apply neutral cleaner to low-soil zones, and a degreaser where needed. Use a microfiber mop or pad with light pressure and overlapping strokes. Avoid saturating grout. Respect labeled dilution; too much cleaner can leave residue and invite streaks. After agitation, perform a clean-water rinse and dry with a microfiber towel to spot remaining haze or streaks. This disciplined approach yields a uniform, polished appearance without risk to grout integrity.
Step 5: Focused Grout Care
Once field tiles look good, spotlight the grout. Use a grout-safe cleaner. Apply, allow a two-to-five-minute dwell (per label), and agitate with a soft brush. Rinse well with clean water and dry. Inspect under a bright light or a flashlight to see whether discoloration remains concentrated in low spots or along edges. If needed, repeat in only those areas. Keeping grout work separate from general mopping ensures you do not miss embedded soils or trap residue.
Step 6: Rinse, Dry, and Inspect
Rinsing removes chemistry that would otherwise form a sticky film. Replace recovery water as it clouds. Dry with microfiber to prevent mineral spotting, especially if your household uses hard water. Inspect at multiple angles, including low-angle light across the floor, which can reveal streaks and uneven sheen. Adjust your method next time based on what you observe today—add a minute of dwell here, change mop pads sooner there, and upgrade brushes where grout texture demands it.
Step 7: Reassemble the Room
Return mats and furniture only after surfaces are dry. Wipe baseboards, thresholds, and the edges of appliances to remove splashes. In bathrooms, test exhaust fan operation. In kitchens, verify that cooker hoods and nearby walls are free from residual smears. Take a quick phone photo of any stubborn grout lines for comparison after your next deep session.
Elizabeth-Specific Cadence
Weather swings in Elizabeth influence frequency. During winter, increase vacuuming of entryways to capture salt and grit that can abrade tile. In humid summer weeks, boost bathroom ventilation and squeegee showers after use. Aim for weekly damp cleaning in kitchens and biweekly in low-traffic areas, with a focused grout session monthly in busy rooms. This cadence helps you get ahead of seasonal pressures rather than reacting to them.
Common Mistakes to Avoid
Skipping dry soil removal, overdosing cleaner, rushing dwell time, using overly stiff brushes, and failing to rinse are the main pitfalls. Another is cross-contamination: using the same mop head in the bathroom and kitchen. Color-code tools and assign them by room. Finally, leaving floors wet invites mineral spotting and mildew odors; a simple microfiber dry-down eliminates both issues while improving shine.
When to Consider Sealing
Test grout by sprinkling water: if it rapidly darkens and does not bead, sealing may help reduce future soiling. Clean thoroughly and ensure complete dryness before applying a compatible sealer. Record application dates and plan periodic inspections. Sealing is not a substitute for good cleaning habits, but it reduces the energy required to maintain bright lines in high-traffic Elizabeth corridors.
Upgrading Your Mid-Clean Strategy
Halfway through a project, pause and check results. If grout remains darker in traffic lanes, extend dwell time slightly, focus agitation on joints, and improve your rinse cycle. If glossy tile shows haze, dilute cleaner more and change pads sooner. When you want to measure your progress against the methods used by experienced crews, use approaches popular in professional tile and grout cleaning and compare your sequence, dwell strategy, and rinse steps to proven workflows.
Bathroom Deep-Dive
Showers need special attention. Daily squeegeeing keeps minerals and soap from baking onto surfaces. Weekly, treat lower walls and corners with a non-acidic cleaner and brush grout gently. Target glass edges where minerals concentrate. Improve airflow by keeping shower doors cracked open after use and running fans for at least twenty minutes. Replace or wash curtains periodically and check caulk lines for gaps that allow moisture intrusion behind tile.
Kitchen Deep-Dive
Grease behaves differently from mineral soils. Use an appropriate degreaser on the cook zone and floor area near oven doors. Wipe cabinet toekicks and kickplates where splatters land unnoticed. Clean under appliance edges where crumbs accumulate. Maintain mats near sinks and prep stations to intercept moisture and reduce slip risk. Rinse thoroughly to prevent tacky residues that attract dust and immediately dull your work.
Entryways and Hallways
These lanes represent your first line of defense. Deploy quality mats inside and out. Vacuum often during slush season. Spot-clean stains quickly to keep soils from migrating into adjacent rooms. Evaluate whether rearranging furniture or adding a secondary mat reduces tracking. A few minutes here can save you an hour later in kitchen and living areas downstream of the front door.
Health and Safety Considerations
Use gloves and ensure adequate airflow when applying cleaners. Keep children and pets out of the work zone. Never mix chemicals. Store products in original containers and label spray bottles clearly. If you experience persistent odors or irritation, switch to milder chemistry and increase ventilation. Good safety habits are a permanent part of your step-by-step process, not an afterthought.
Maintenance Between Deep Sessions
Adopt small habits that pay off: wipe spills immediately, dry bathroom corners, and give high-traffic paths a quick vacuum pass each evening. Keep a microfiber cloth hung in the bathroom for speedy wipe-downs after steamy showers. Build a five-minute “reset” after dinner to deal with kitchen splatters before they set into grout.
FAQ
Q: How often should I clean bathroom grout? A: In active Elizabeth homes, brush grout lines lightly weekly and perform a focused deep session every four to six weeks.
Q: Is steam cleaning safe? A: Steam can help on ceramic and porcelain with intact grout and caulk, but avoid on unsealed stone or compromised joints. Test a small area first.
Q: Why does my floor feel sticky after mopping? A: Over-concentration of cleaner or poor rinsing leaves residue. Use correct dilution and a clean-water rinse, then dry.
Q: Do I need a special brush for grout? A: A soft nylon brush with tapered bristles is ideal. Avoid metal or extremely stiff brushes that can erode grout.
Q: Should I seal my grout? A: If water absorbs quickly and staining is frequent, sealing can reduce maintenance effort. Clean and dry thoroughly before application.
Q: What about natural stone? A: Use stone-safe, pH-neutral products and avoid acids. Confirm compatibility with the manufacturer.
Put the Steps to Work
Consistent, methodical steps deliver brighter grout, safer traction, and longer-lasting tile. Start with dry soil removal, apply targeted chemistry with adequate dwell time, agitate gently, rinse thoroughly, and dry. Adjust your cadence to New Jersey’s seasons and your household’s realities, and keep quick notes so each session improves the next. If you want an occasional professional reset—or a model you can emulate at home—schedule a trusted team that specializes in expert tile and grout cleaning to help you lock in a routine that stands up to Elizabeth’s busy pace.
Ready to Refresh Your Floors in Elizabeth?
Put these steps into motion this week in one small room and build momentum from there. If you decide to bring in a partner for periodic deep work or to benchmark your routine, choose a local crew experienced in tile and grout cleaning so your home benefits from proven methods, careful rinsing, and the right chemistry for your surfaces.